Step Seven: Make Adjustments to Clips
Now that you have a movie with video, photos, and a title, you may want to make
some adjustments to your video clips. Most of the editing you do in iMovie occurs in
the timeline viewer. In this step, you’ll learn how to make small or large changes to your
video clips by trimming them in the timeline viewer.
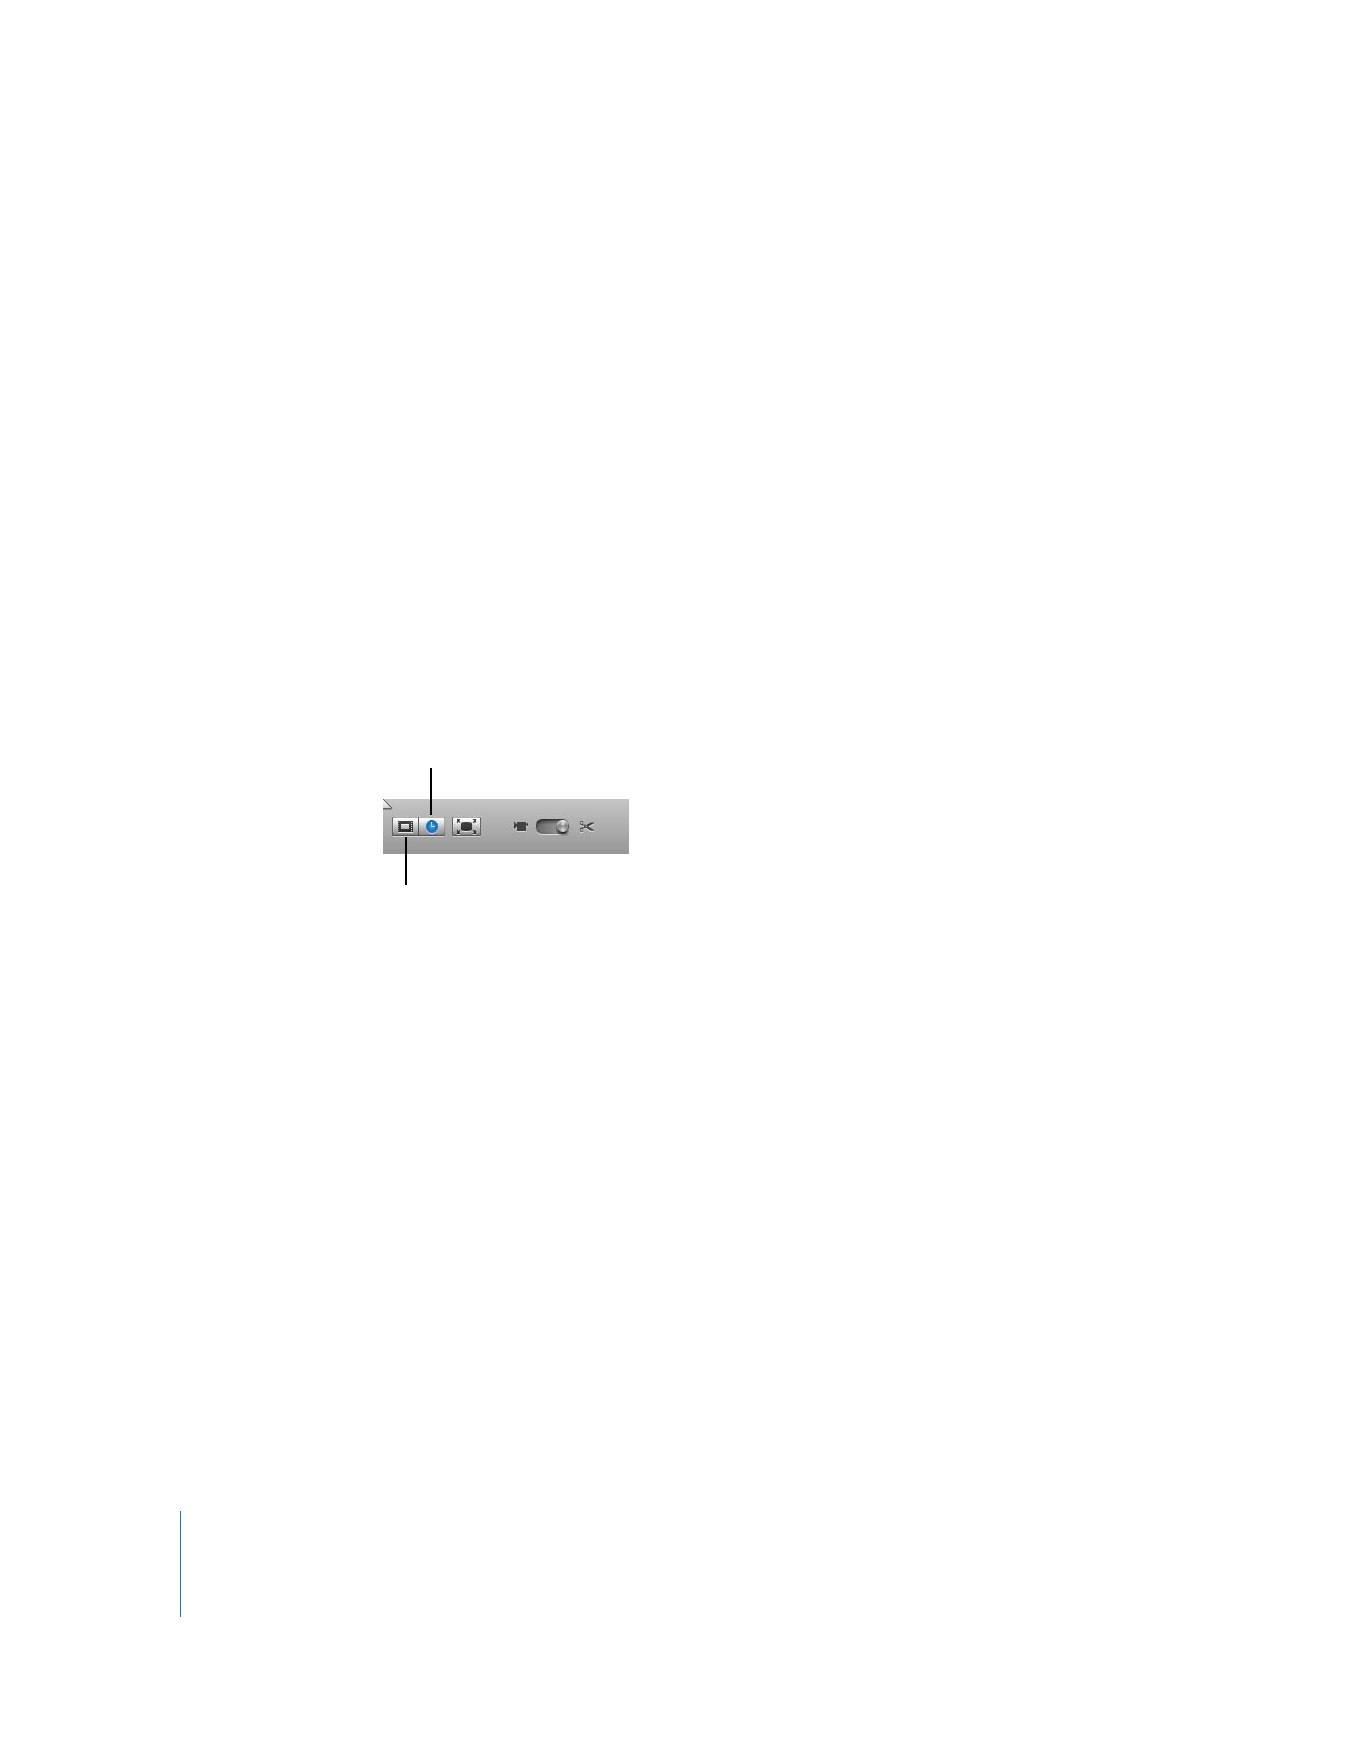
To switch to the timeline viewer:
m
Click the timeline viewer button below the iMovie monitor. The timeline viewer button
has a clock on it.
Video clips appear in the top track in the timeline viewer. You can drag the slider in the
bottom-left corner of the window to make clips appear larger or smaller in the timeline
viewer. You may want to make the clips smaller to see more of them in the window, or
make them larger for more precise editing.
To quickly trim a clip:
m
Drag from the end of the clip toward the center of the clip. (The pointer changes shape
to show where you can drag.)
Timeline viewer button
Clip viewer button
Chapter 2
iMovie HD Tutorial
25
The trimmed video is still present, but it won’t appear in your movie. If you decide to
lengthen the clip later, you can drag the end back out to restore all or part of the
hidden video. When you drag the edge of a clip, the adjoining clips move (or “ripple”)
along with it. Therefore, if you shorten or lengthen a clip, you shorten or lengthen your
entire movie.
Important:
You can’t use this method of trimming if clip volume levels are showing.
To hide clip volume levels, choose View > Show Clip Volume Levels to remove the
checkmark. (A selected item has a checkmark next to it; you choose the item again to
deselect it.)
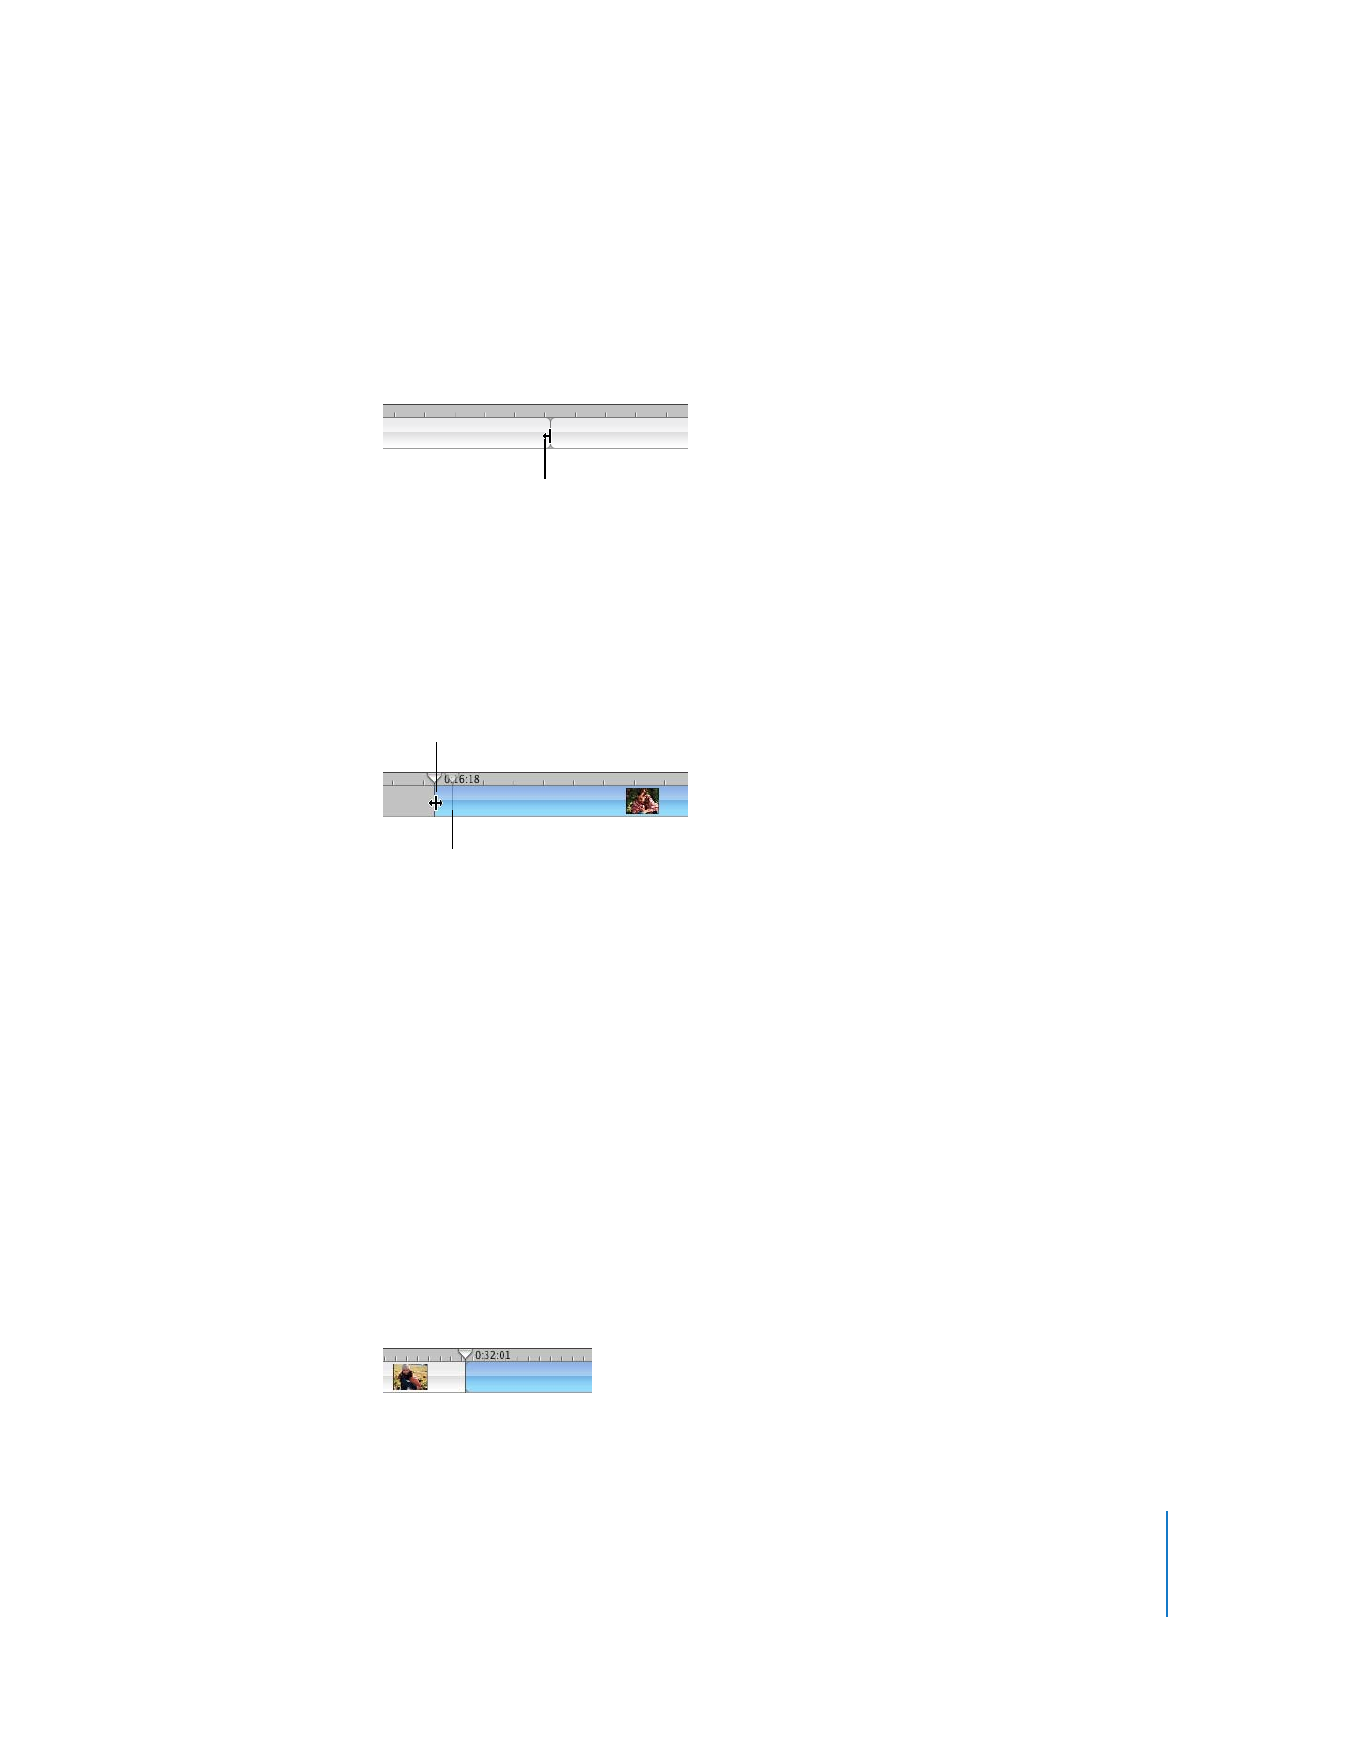
You can take advantage of the “ghosted playhead” in iMovie HD to choose the exact
frame where you want trimmed video to begin or end, then trim to that spot.
To precisely trim a video clip:
1
Click the clip you want to edit in the timeline viewer.
2
Drag the playhead to the frame where you want the clip to begin or end.
3
Position the pointer over the end of the clip until you see the pointer change shape.
4
Drag the end of the clip to the “ghosted” playhead (shown above) to remove the
frames that you want trimmed.
A yellow line appears and the edge of the clip automatically “snaps” against the edge of
the “ghosted playhead” when you reach the frame you selected in step 2.
5
Repeat the procedure on the other end of the clip, if you want.
Once you begin trimming clips, you’ll notice a difference in the appearance of clips in
the timeline viewer. In the illustration below you can see that full clips have rounded
corners. Clips that have been trimmed or cropped have straight edges where they’ve
been shortened. You can always extend a clip with straight ends.
Pointer
Pointer
Ghosted playhead

26
Chapter 2
iMovie HD Tutorial
You get different results depending on where you place the pointer when you drag a
clip. Dragging from the end shortens or lengthens a clip, while dragging from the
center moves the clip to a different location in your movie. When you move a clip over
another clip, the clip you’re moving pushes aside the clip and all the adjoining clips,
moving them all in the direction you’re dragging.
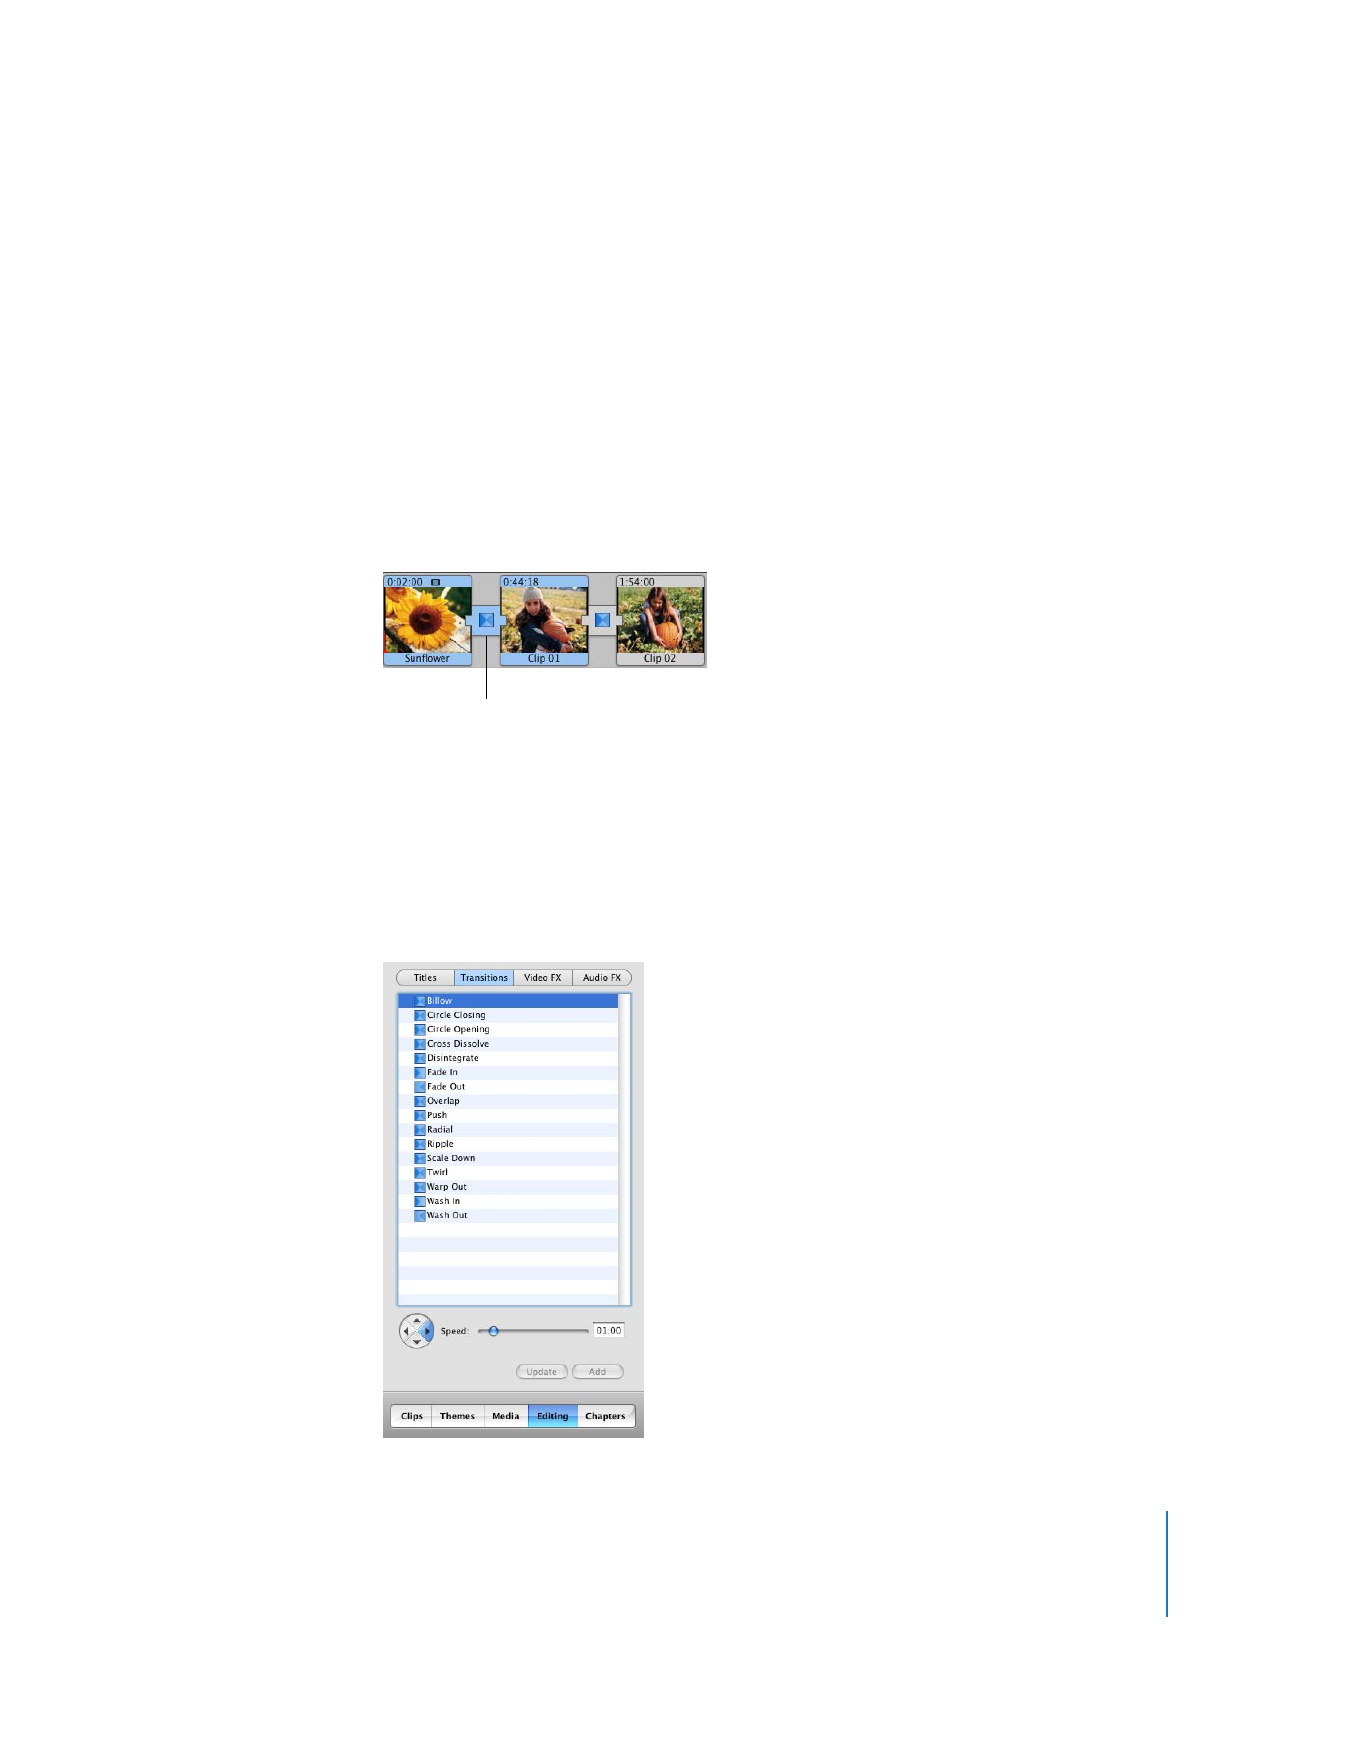
Any time you move a clip to the right, a gap is created. You can drag other clips to fill
the gap, or you can leave a gap as a handy background for text or to add an extra
dimension to a transition or effect. The illustration below shows what a gap looks like
in the timeline viewer.
∏
Tip: A fast way to close up a gap is to view it in the clip viewer, where it appears as a
black clip. Select the black clip and delete it.
Another way to quickly alter a clip is to split it in two. You may want to split a clip so
that you can insert titles, add other clips or images, or reorder the sequence of clips.
You can split clips that are in the Clips pane, clip viewer, or timeline viewer. You can also
split audio clips in the timeline viewer.
To split a clip:
1
Click a clip to select it.
2
Position the playhead where you want to divide the clip.
3
Choose Edit > “Split Video Clip at Playhead.”
Gap
Did You Know?—Adding Special Effects
You can add interesting effects to your movies to lend them special appeal, focus, or
a sense of fun. iMovie HD offers a range of video effects that can make clips shake as
if during an earthquake, fling sparkling fairy dust across the screen, filter a scene with
passing fog, or add a streak of electricity to an image. Other effects change the
brightness or contrast of the video, add slow motion, change colors, soften the focus,
and more.
To find out more about adding special effects to your movie, see iMovie HD Help.
Chapter 2
iMovie HD Tutorial
27